Sunday, December 27, 2009

Gluten Free Yule Log

I have been pretty excited about this yule log I was going to make for Christmas. What is a yule log? It is a log (as in piece of a tree) shaped cake. Sounds simple, right? It was actually pretty easy, especially since I'm an old pro at making my favorite raspberry buttercream by now (disregard the cupcake recipe here, I just used the same frosting as my filling for the log). Raspberry isn't the most traditional filling for such a festive treat, but the raspberry/chocolate combo is always a crowd pleaser. I also made this gluten free, which was very easy since it wasn't a very high gluten recipe to begin with.

My yule log consisted of:
Chocolate roulade (cake)
Raspberry buttercream (see link above)
Chocolate ganache glaze
Meringue Mushrooms

First order of business is to make your cake.

Chocolate Roulade:
6 egg yolks
6 egg whites
3/4 cup sugar
1/4 cup cocoa powder (cocoa powder sometimes has gluten...a good way to know for sure is to use pure cocoa which is apparently always gluten free)
1/4 cup all purpose flour (I used better batter, a gluten free alternative flour)

Preheat oven to 400 degrees. Line a jellyroll pan with parchment paper.

Beat egg yolks in a standing mixer with whisk attachment for around 5 minutes or until pale yellow. Transfer to large bowl (really large, you'll have to fold in the rest of the ingredients later). Clean out the mixer bowl and whisk attachment to use again.

With your clean mixer, beat egg whites on medium for around 2 minutes, until soft peaks form. Increase speed to high and gradually add sugar. Keep whipping until stiff peaks form. What do stiff peaks look like? This:


Then, add the egg white mixture to the egg yolk mixture (add the whites in two batches).


Carefully fold the mixture with a spatula. This me folding!


When most of the white streaks are gone, sift in the cocoa and flour. As someone who usually skips the sifting, DON'T!! If you don't, it will be too heavy and the batter will collapse. Then the cake won't roll as easily later on. If you don't have a sifter, you can use a fine mesh strainer. I just prefer using a strainer, so I never bother with the traditional sifter.


Yes, this particular fine mesh strainer is actually meant for your shower drain. Make fun of me all you want BUT - it is small enough to give you more control over what you're sifting, that convenient rims allows you to place over a cup if you're dealing with something that needs to be strained and it was probably much cheaper than if it were specifically meant for the kitchen. Works great.

Once all the ingredients are combined, pour batter into prepared pan. Smooth top with an offset spatula.


Cook for 9-10 minutes. You'll know it is done when you press the cake with your finger and it will spring back up. Turn the cake onto a wire rack and peel parchment paper off.


Let the cake cool completely. Now is a good time to make your ganache, since you'll have to let that sit for a little bit before you cake frost the whole thing. The ganache is really simple, just melt together:

12 ounces of bittersweet chocolate (I use 60%...you'll know what that means when you're shopping and all the chocolates have percentages)
1 and 2/3 cup of heavy cream
You can also use a little alcohol - grand marnier, cognac, brandy...whatever you please. I used a dab of brandy.

Make sure that you're melting this together in a double boiler (do NOT just put a saucepan over the burner with chocolate) and stirring constantly. When that is done, set aside and let cool until a frosting like consistency (when it is first done, it will be pretty liquidy). Don't let overcool since it is a pain to reheat.

Now, make your buttercream while that is cooling. See above link for buttercream recipe. You don't have to make it raspberry, you can do whatever you'd like!

Now, the fun part! Spread the buttercream over the cooled cake set over aluminum foil. I probably used a little too much buttercream, but oh well.


With the help of the foil, roll the cake (in the direction so that the cake will be as long as possible, not as fat as possible...so, roll in the long side of the cake). It was actually pretty easy. The spongy cake didn't crack at all!


Cut off the ends of the cake - for two reasons. One, because they probably don't look pretty and two, to make your branches! I cut mine at a slant to look more realistic. Stick the "branches" on the "tree". Ugly side facing the log. I had enough frosting squish out of the branches so that I didn't need to use additional frosting as glue, but that would work if you're having trouble. Mine stuck on no problem.


Assuming your ganache is cool enough so that it won't run off the sides of the cake, glaze the whole thing. If you'd like (and of course I did), you can run a decorating comb over the whole thing for striations. Makes it look more like bark.


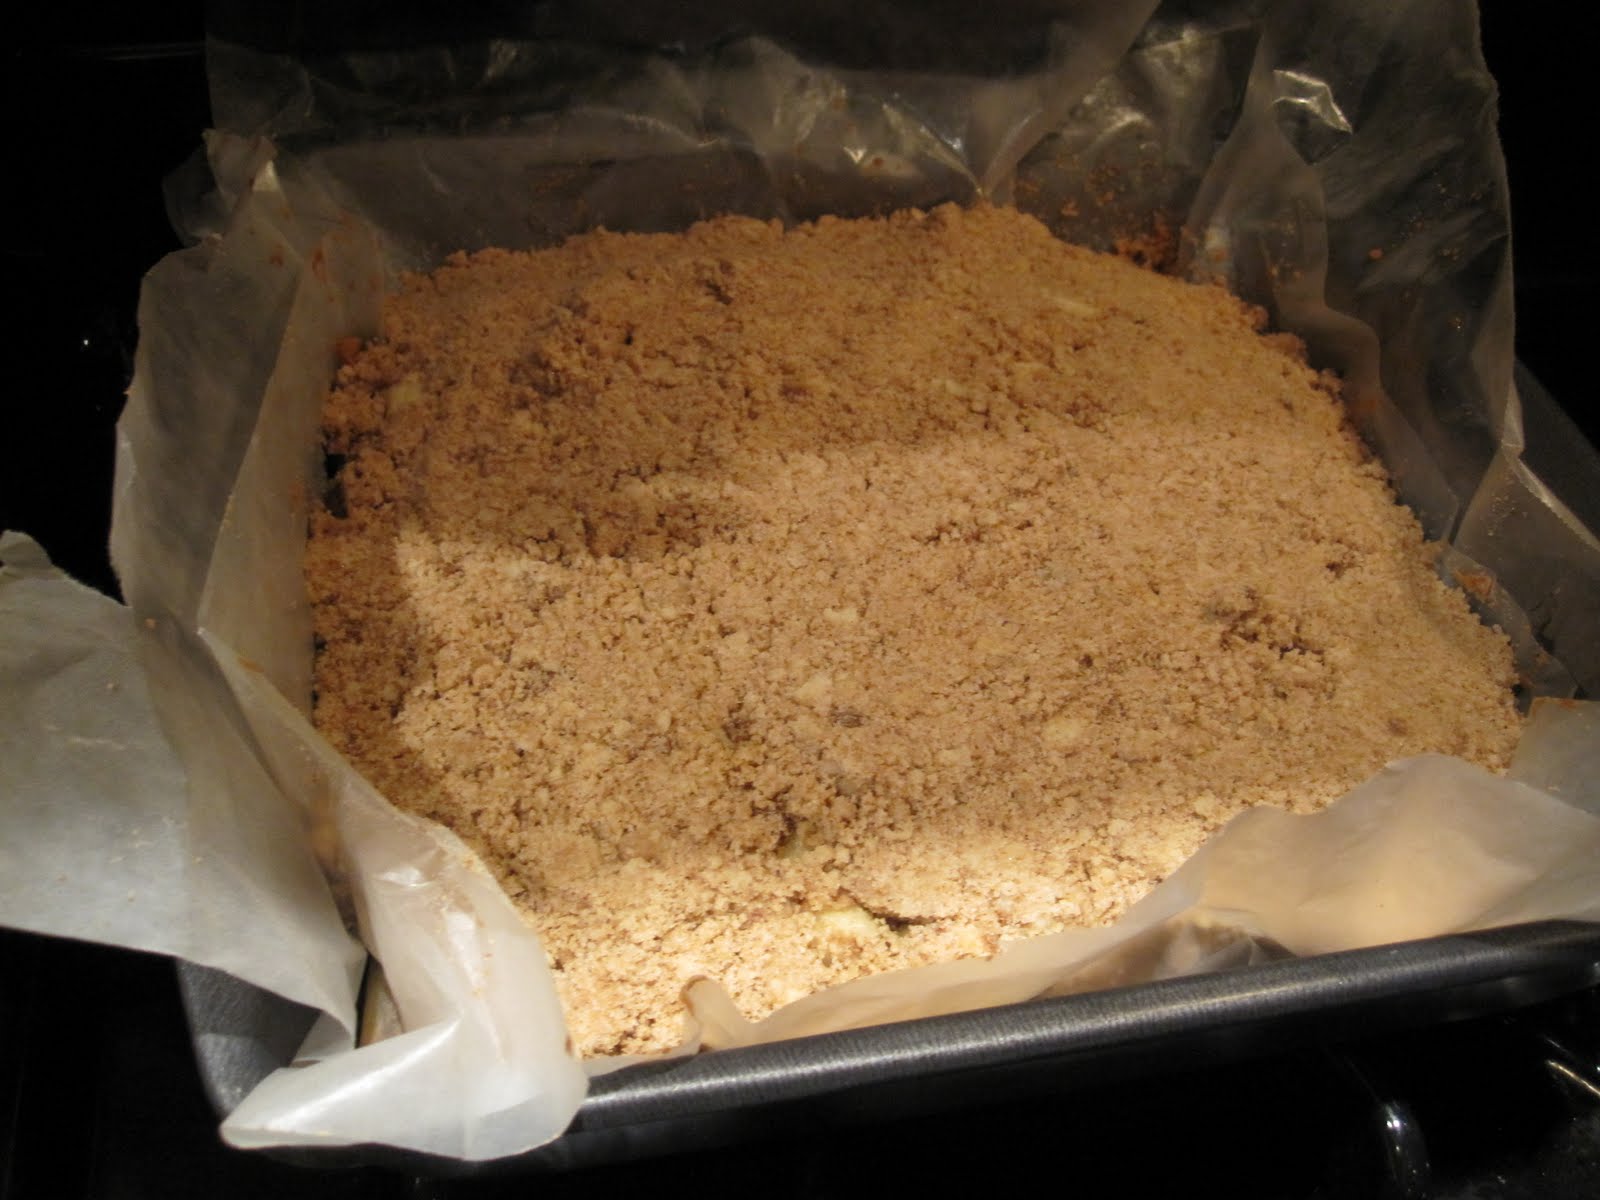
You can sprinkle (using a sifter) some confectioners sugar over the whole thing to look like snow. Or, you could use cocoa shavings, cocoa powder...anything you'd like. Also, I made meringue mushrooms. I made them purely for decoration until I realized they were actually pretty tasty!

Ingredients:
2 large egg whites
1/4 teaspoon cream of tartar (which is gluten free, hooray!)
1/2 cup superfine sugar (aka caster sugar...can also be achieved by putting regular white sugar in a food processor for 30 seconds)
Melted chocolate (any kind, I used ganache)

In electric mixer with whisk attachment, beat egg whites until they just start to get foamy. Add cream of tartar and continue to beat at medium speed until soft peaks. Increase speed to high, and add sugar gradually until eggs are stiff and glossy. Transfer to pastry bag, and pipe the caps and stems separately onto a jellyroll pan covered in parchment paper. It would be helpful to have a picture here, but of course I forgot to take one. But just visualize what the caps and stems would look like and you should be good to go. Bake them at 200 degrees for around an hour. Dip the caps in melted chocolate and then stick the stem on the bottom. Sift cocoa powder over the mushrooms if you wish and let them harden in the fridge.


They weren't perfect, but not bad for my first meringue mushroom attempt. Line them up on and around the cake, and you're good to go! A very appropriate dessert for Christmas dinner. Some pictures below of the whole cake as well as some slices.


We couldn't find a plate big enough, so it hung over both sides :-)


Beef Tenderloin

What else would you have for Christmas dinner? Mom ordered a beef tenderloin from West Concord Supermarket, which has great beef. We marinated it all day then served with a blue cheese sauce. Recipes below, starting with the marinade.

Marinade:
1 cup red wine
1 cup teriyaki sauce (we used gluten free)
2 pressed cloves of garlic

Rotate the beef a few times through the course of the day. Then cook as follows:
Preheat oven to 450 degrees. Once heated, cook meat in large roasting pan for 15 minutes at 450. Reduce heat to 375 and cook for another 30-40 minutes. Allow to sit for around 10 minutes before serving. Look at this perfectly cooked cut of beef:


For sauce, melt the following together in saucepan over medium heat:
4 ounces blue cheese
1/3 cup mayonnaise
2/3 cup sour cream
1/5 teaspoons worcestershire sauce

Here is a picture of the sauce. I doubled this recipe and made a little too much!


Serve! Guaranteed crowd pleaser. Here is a picture of the beef, sliced and on the table.


Scalloped potatoes

I made these the first time for Easter dinner that I hosted back in the Spring and they were a hit. I would only consider making these for a holiday, because they're sooo good but so high in calories. Even on Christmas I only ate a little bit, which was what I made them for this time around - Christmas dinner!

Ingredients

2 tablespoons unsalted butter
1 medium onion , minced (about 1 cup)
2 medium cloves garlic , minced or pressed through garlic press (about 2 teaspoons)
1 tablespoon chopped fresh thyme leaves
1 1/4 teaspoons table salt
1/4 teaspoon ground black pepper
2 1/2 pounds russet potatoes (about 5 medium), peeled and sliced 1/8-inch thick
1 cup low-sodium chicken broth
1 cup heavy cream
2 bay leaves
4 ounces grated cheddar cheese , shredded (1 cup)

Instructions

  1. Adjust oven rack to middle position; heat oven to 425 degrees.

  2. Melt butter in large Dutch oven over medium-high heat until foaming subsides. Add onion and cook for around 4 minutes (soft and a little brown). Add garlic, thyme, salt, and pepper and cook for another 30 seconds. Add potatoes, chicken broth, cream, and bay leaves and bring to simmer. Cover and reduce heat to medium-low. Simmer until potatoes are almost tender (paring knife can be slipped into and out of potato slice with some resistance), about 10 minutes. Discard bay leaves.

  3. Transfer mixture to 8-inch-square baking dish and press to an even layer. Sprinkle with cheese. Bake until cream is bubbling around edges and top is golden brown, about 15 minutes. Cool 10 minutes before serving.

Here is a picture - see how nice and cheesy and creamy they are?


Roasted Potatoes

I made roasted potatoes to accompany the filet mignon that Doug and I made for our romantic Christmas time date. Woohoo! They were delicious, but we couldn't help busting out the ketchup. These were not too elegant, so I am not sure I would pair with filet mignon again but they were so good!

Ingredients

2 1/2 pounds Yukon Gold potatoes , rinsed and cut into 1/2-inch-thick slices

Table salt
5 tablespoons olive oil

Ground black pepper

Instructions

  1. Adjust oven rack to lowest position, place rimmed baking sheet on rack, and heat oven to 450 degrees.

  2. Place potatoes and 1 tablespoon salt in Dutch oven or large saucepan with tightly fitting lid. Add cold water to cover potatoes completely. Bring to boil, then reduce heat to medium-low and gently simmer for around 5-10 minutes. This will depend on how thickly you cut the spuds. The potatoes should be just undercooked when you remove them from heat for this step. Drain potatoes well and transfer to large bowl. Toss with 4 tablespoons oil and 1 teaspoon salt. Working quickly, remove baking sheet from oven and transfer potatoes to baking sheet and spread into even layer (skin-side up if end piece).

  3. Bake until bottoms of potatoes are golden brown and crisp, 15 to 25 minutes, rotating baking sheet after 10 minutes. Remove baking sheet from oven and, using metal spatula and tongs, loosen potatoes from pan, carefully flipping each slice. Continue to roast until second side is golden and crisp, 10 to 20 minutes longer, rotating pan as needed to ensure potatoes brown evenly. Season with salt and pepper to taste and serve immediately.

This is a pretty bad picture, but you get the idea:


Seared Scallops with Chipotle Orange Sauce

I usually don't cook much seafood at home. However, scallops are so easy and tasty. This recipe was particularly easy and very flavorful.

1.5 lbs sea scallops
1/2 teaspoon paprika
1/4 teaspoon salt
1/2 cup fresh orange juice
1 tablespoon chopped canned chipotle chile in adobe sauce
1/4 cup chopped green onion

Melt a little butter in a large skillet over medium high heat. Sprinkle scallops with paprika and salt (I didn't use measurements, just sprinkled over the scallops). Add to pan and cook for 3-4 minutes on each side. Don't move them around in the pan, just flip them once to cook the other side. Other than that it is best for them to just sit still. Here mine are, sitting still, after they've been turned over:


Remove from pan, but leave burner on to make sauce. Add OJ and chile to pan and bring to a boil. Let cook for around a minute then pour over scallops. Garnish with green onions. Here is the finished product, ready to be eaten!


Pork Au Poivre

This was super easy, especially since I had most of these ingredients in my pantry. Just had to stop by the supermarket and buy a pork tenderloin. This lasted for 2 meals for 2 people.

Preheat oven to 425 degrees.

Cut a 1 lb pork tenderloin down the middle, but not enough to split the tenderloin. Just enough so that you can lay the pork flat. Sprinkle each side with coarsely ground pepper (use however much you like). Heat a little olive oil over medium-high heat in a large ovenproof skillet that has a lid. Add pork and brown, around 2 minutes on each side. Put the lid on the skillet and stick the whole thing in the oven. Bake for around 12 minutes, or until the meat thermometer reads 160 degrees. Transfer to cutting board. This was the only picture I took while I was cooking, sometimes I forget about pictures!!


While the pork is in the oven, make your sauce. Bring 1/2 cup low sodium chicken broth, 1/2 dry red wine, 1 teaspoon dijon mustard, 1 teaspoon tomato paste and 1/4 teaspoon salt to a boil. Let cook for around 3 minutes.

And that is it! I served with cous cous with pine nuts and parmesan. This was super easy and made great leftovers.

Saturday, December 26, 2009

Filet Mignon with Bearnaise

Doug and I decided to do a little romantic dinner at home right around Christmas. Somehow in the madness of the holidays we found time for a little filet :-)

We hadn't taken our mini grill off of the deck before the snow storm, so we were left with cooking our steak with the stove. It is OK, I was up for the challenge. I chose to make a bearnaise sauce to accompany it, as well as roasted potatoes. I also made a side salad, though only one of ate our salad, can you guess which one of us was too interested in his meat and potatoes to eat greens? Hmm?

Preheat the oven to 450 degrees, with a baking sheet on the center rack. Wait until the oven is completely heated before you turn on the burner as your steak won't be on the stovetop long. Heat a large skillet that has a lid on a burner over high heat. While that is heating, rub each side of each steak with a little olive oil, salt and pepper. Place steaks in the hot pan and cook for 3 minutes on each side. Transfer steaks to the baking sheet in oven (using tongs) and cook for 6-8 minutes. This is for medium rare, which I think is how steak should be cooked! However, if you don't like it cooked medium rare, and would prefer to use a meat thermometer rather than time, here is the temperature chart:

Rare - 120-125
Medium Rare - 130-135
Medium - 140-145
Medium Well - 150-155
Well - 160+ (but shame on you for overcooking good meat)

Here is the recipe for the bearnaise sauce:

Ingredients:
2 tablespoons tarragon vinegar
2 tablespoons dry white wine
1/4 cup finely chopped shallot
1/4 teaspoon ground black pepper
1 tablespoon finely chopped tarragon leaf
3 large egg yolks
1 tablespoon water
1 stick butter
salt to taste
few drops lemon juice

Combine first five ingredients in a small saucepan and bring to simmer over medium heat. Let simmer for around 5 minutes. Add egg yolks and water to pan, stirring while adding so eggs don't scramble (also make sure pan isn't too hot for same purpose). Once entirely added, whisk thoroughly. Reduce heat to low, still stirring constantly. Add butter gradually and salt and lemon juice at end. Serve warm over the steak.

This was a fantastic meal, and great with the crisp roasted potatoes which will be a separate post. And I thought we cooked it perfectly!


Butternut Squash Soup

This was really easy, and super healthy. And lasts for a few days.

Heat a little olive oil or butter in a dutch oven over medium heat. Add:
1 yellow onion, chopped
2-3 carrots, peeled and diced
1 butternut squash (cut open, clean out seeds, and dice into 1' cubes...or buy the prepackaged one from Whole Foods)

Let those cook for around 15 minutes, then add:

1/2 teaspoon ginger
1.5 qt. of vegetable stock
1 grated orange zest
dashes of nutmeg, pepper, and salt

Boil for 45 minutes or until vegetables are tender

Puree a hand (or counter) blender to desired consistency. Here is mine, still steaming hot with the hand blender.

This is really good, but you have to season pretty heavily (with black pepper or red pepper flakes). I also like to have it with pine nuts and Doug likes his with some gorgonzola crumbles.

Peppermint cupcakes!!


Happy holidays!! No recipe here. Just variation of a cupcake I made earlier - chocolate with raspberry frosting. The cake portion was the same, and the frosting was close. Follow all directions, but obviously stop before you add anything raspberry. Instead, add 2 teaspoons peppermint extract and top with crushed candy cane. They were awesome.

Enchiladas Verdes

I have made enchiladas a few times, but always beef with red sauce. It was time to spice things up a little bit! I decided to try "the green kind". I also decided to make it with chicken. But I still served with Mexican Rice, because it is so good.

Ingredients:
4 teaspoons vegetable oil
1 yellow onion, chopped
3 medium garlic cloves, minced or pressed
1/2 teaspoon cumin
1.5 cups low sodium chicken broth
1 lb boneless chicken breasts (2-3 breasts)
3 cans tomatillos (11 ounce cans), drained & rinsed
3 medium poblano chiles, halved lengthwise (take out seeds if you don't like spicy)
2.5 teaspoons sugar
1/2 cup chopped cilantro
Grated cheese - pepper jack or monterey jack (amount depends on your personal preference)
12 6 inch corn tortillas

Adjust oven racks to top of oven and turn on broiler. Toss tomatillos and poblanos with a little oil in a bowl and transfer to rimmed baking sheet lined with foil (poblanos skin-side up). Broil until vegetables blacken - around 5-10 minutes. Cool for another 5-10 minutes, then remove skin from poblanos only. They'll come off easily. Transfer tomatillos and chiles to food processor.

While the chiles are cooking and then cooling, cook the chicken. Heat the other half of the oil in a medium saucepan over medium heat, then add onion and cook until translucent. Add garlic and cumin and let that cook for another 30 seconds or so. Decrease heat to low and stir in broth. Add chicken, cover, and simmer until instant-read thermometer inserted into thickest part of chicken registers 160 degrees, 15 to 20 minutes, flipping chicken halfway through cooking. Transfer chicken to large bowl; place in refrigerator to cool, about 20 minutes. Remove 1/4 cup liquid from saucepan and set aside; discard remaining liquid.

Add sugar, 1 teaspoon salt and reserved cooking liquid to the chiles and tomatillos in the food processor. Process until sauce is somewhat chunky, about eight 1-second pulses or until it looks like this:

Taste sauce; season with salt and pepper. Set sauce aside (you should have about 3 cups). When chicken is cool, pull into shreds using hands or 2 forks, then chop into small bite-sized pieces. Combine chicken with cilantro and 1.5 cups cheese. This is the pulled chicken before combining with cilantro and cheese:

Preheat oven to 450 degrees. Smear bottom of 13- by 9-inch baking dish with 3/4 cup tomatillo sauce. Warm up tortillas in the microwave. Spread 1/3 cup filling down center of each tortilla. Roll each tortilla tightly and place in baking dish, seam-side down. Pour remaining tomatillo sauce over top of enchiladas. Use back of spoon to spread sauce so that it coats top of each tortilla. Sprinkle with remaining cheese and cover baking dish with foil. Bake enchiladas on middle rack until heated through and cheese is melted, 15 to 20 minutes. Again, I served with the mexican rice but you could also garnish with scallions, radish, sour cream, guac, etc. The whole pan:

Doug's plate, complete with rice :-)

Wednesday, December 9, 2009

Rugelach

What a fun experiment! I had never made rugelach before. For anyone wondering what I'm talking about, is pronounced rueg - ella. Usually found in glass jars in bakeries and apparently not spelled phonetically.

It was actually pretty easy, just a little time consuming because of all of the chilling involved. A good project to do while you're doing other stuff around the house. You'll soon see what I mean. Don't skip the chilling - it is the same idea as pie dough. In order to achieve a flaky crust, the butter needs to stay cold until put in the oven. There should be visible slivers of butter in the crust when you're done processing.

Crust:
2.5 cups all purpose flour
1.5 tablespoons sugar
1/4 teaspoon salt
16 tablespoons cold unsalted butter
8 ounces cold cream cheese, cut into 1/2 inch chunks
2 tablespoons sour cream

Pulse flour, sugar and salt in food processor, just enough to combine. Add butter, cream cheese and sour cream and pulse 8-10 times until the dough comes together in small crumbles. Turn the mixture onto a clean counter. Divide into four equal pieces. Knead each pile just enough to bring together into a round and cover with saran wrap. Chill for a few minutes, taking out one at a time to roll out to a circle. The circle should be around 9 inches in diameter. As you finish rolling out each round, store the rolled out dough in the freezer. Each round should stay in the freezer for around 20-30 minutes total.

Process 1 cup of apricot preserves in a food processor to eliminate large fruit chunks. Also, combine 1 cup of sugar with 1 tablespoon of ground cinnamon. For each of the rounds, spread 1/4 cup of preserves over the whole thing, then layer 1/4 cup golden raisins, 2 tablespoons of the cinnamon sugar mixture and 1/2 cup finely chopped walnuts. Cut the round into 8 pieces like a pizza. Starting with the fat end of each slice, roll the dough so that it creates a crescents. Here is a picture of one crescent with the rest of the dough in the background:


I rolled then around in some of the extra walnuts laying around for some extra texture on top. Once you have rolled all of your crescents, line up on a baking sheet and freeze for 15 minutes. During this time, preheat the oven to 375 degrees. Once out of the freezer, brush crescents with egg yolk diluted with some water or milk. Cook for around 20 minutes, or until the top is puffy and gold. Immediately out of the oven, sprinkle some more of the cinnamon sugar mixture on top. All done!! Now enjoy!


Peppermint Bark

This was pretty easy! I love peppermint bark, but the Williams Sonoma/Starbucks versions are so expensive. The at home version is much cheaper.

You can use any sort of peppermint candy as the topping. I used candy canes. You can crush them up by putting in a ziplock bag and a hammer. See here:


Preheat oven to 250 degrees. Line a jelly roll pan with wax paper and spray with non stick cooking spray. Spread a bag of bittersweet chocolate chips over the pan and put in the oven for just a few minutes until the chips melt. Using an offset spatula, spread chocolate over pan. Let cool a little, meanwhile melting a bag of white chocolate chips in a double boiler. When white chocolate is melted, mix in a teaspoon of peppermint extract. Pour melted white chocolate and spread over the dark chocolate. Sprinkle crushed peppermint candies over the white chocolate and let cool completely before breaking up the bark.

The final product:


Pumpkin Loaf

This is way delayed! I made this for Thanksgiving. I actually made two - one for a present and a gluten free version for Thanksgiving dinner. I glazed the regular (non gluten free version). For the gluten free loaf, I just used Better Batter. This recipe makes two large loaves.

Ingredients:
  • 1 (15 ounce) can pumpkin puree
  • 4 eggs
  • 1 cup vegetable oil
  • 2/3 cup water
  • 3 cups white sugar
  • 3 1/2 cups all-purpose flour
  • 2 teaspoons baking soda
  • 1 1/2 teaspoons salt
  • 1 teaspoon ground cinnamon
  • 1 teaspoon ground nutmeg
  • 1/2 teaspoon ground cloves
  • 1/4 teaspoon ground ginger
Preheat the oven to 350 degrees. Grease 2 bread pans. In a large bowl, mix together pumpkin puree, eggs, oil, water and sugar until well blended. In a separate bowl, whisk together the flour, baking soda, salt, cinnamon, nutmeg, cloves and ginger. Stir the dry ingredients into the pumpkin mixture until just blended. Pour into the prepared pans and cook for around 50 minutes, or until a knife comes out clean. The better batter version takes a little longer to cook.

Glaze:
  • 1 4 ounce package cream cheese, softened
  • 1 tablespoon butter
  • 2 cups confectioners sugar
  • 1/2 teaspoon vanilla extract
  • 1 tablespoon milk
Melt all ingredients together, and pour over cooled pumpkin loaf!

This is the version, glazed with gluten:


Wednesday, November 25, 2009

Turkey Burgers

When approached by the Brookline Tab of WickedLocal.com for Thanksgiving leftover ideas, I wanted to figure out my proportions for turkey burgers. For this sort of thing I have a tendency to not use measurements, so I had to figure it out. Make as much as you'd like, but I used the 1 cup standard for ratio purposes. Y0u can also use chicken.

1 cup crumbled roasted turkey
2 tablespoons ricotta
1/2 teaspoon Worcestershire sauce
2 teaspoons dijon mustard
2 tablespoons breadcrumbs
Salt and pepper to taste

To process the turkey, add as much turkey as you need to use up to your food processor. Pulse the blade until the turkey is sufficiently processed. You don’t want it to be turkey paste — just enough so that the turkey is crumbled. If you don’t have a food processor, mince by hand. This is how it should look:

Once crumbled, add in remaining ingredients. Since the meat is precooked, feel free to taste test! Turkey burgers should be cooked just enough to make it a cohesive patty. Here is my meat with all my ingredients:

You can either broil in the oven or cook in a saucepan on the stovetop. Either way, flip the patty halfway (stove will take around 3 minutes per side, broiler around 7) and make sure to use non-stick cooking spray on your baking sheet or saucepan. Garnish how you please!

Patties can always be frozen if you don’t plan to eat them within a few days.


Coffee Cake

I looove coffee cake. Too bad I dropped this one after only a few pieces were consumed. Oh well, probably better off without the calories. From the Holiday Baking edition of the Cooks Illustrated Magazine, page 13. Don't be tempted to substitute all purpose flour for cake flour, or it will be too dry. If you don't have buttermilk handy, you can use an equal amount of plain, low fat yogurt.

Crumb Topping
1/3 cup granulated sugar
1/2 cup packed dark brown sugar
3/4 teaspoon cinnamon
1/8 teaspoon salt
8 tablespoons (1 stick) melted unsalted butter
1 and 3/4 cup cake flour

Cake
1 and 1/4 cake flour
1/2 cup granulated sugar
1/4 teaspoon baking soda
1/4 teaspoon salt
6 tablespoons unsalted butter, softened and cut into 6 pieces
1 large egg
1 large egg yolk
1/3 cup buttermilk

Topping:
Whisk sugars, cinnamon, salt and melted butter in a medium bowl. Add flour and stir until mixed. Set aside to cool to room temperature.

Cake:
Preheat oven to 325. Line an 8 inch square baking pan with parchment paper or aluminum foil and spray with non stick cooking spray. If you are confused, look at the picture below. This is because of the topping - you're not going to be able to turn it over to get it out of the pan, so this allows you to just lift it out.

In a standing mixer, mix flour, sugar, baking soda and salt on low speed to combine. Add the butter one piece at a time and continue beating until the mixture resembles moist crumbles, or when it looks like this:


Add egg, yolk, vanilla and buttermilk. Beat on medium-high speed until light and fluffy, about 1 minute. Scrap down sides if necessary and beat a little more.

Transfer mixture to baking pan and cover with the crumb topping. Bake until crumbs are golden, and test with a knife/skewer in the center of the cake to make sure it is done. The final product, still in the pan:

Now all you have to do to get out of the pan is to lift the sides of the paper! I would keep the paper under it though...coffee cake can be messy to cut!!

Ode to Trader Joes


I just had a give a quick shout out to Trader Joes for their incredible deal on baking chocolate. Look at this baby!! 17 ounces of chocolate for $3.90!! That is less than 23 cents per ounces. When you buy something like Ghirardelli, you're paying around 80 cents - $1 per ounce. Get ready for some fudge posted here pretty soon!!!

Monday, November 23, 2009

Thanksgiving Preview

We're spending Thanksgiving at Aunt Laura & Uncle Toms house in Weston. The good news is that we all get to help cook! I haven't made this yet, so I will have to update with pictures later. But I thought that I would post my recipes now in case anyone needs some help in what to make for their Thanksgiving dinners :-)

First up - stuffing. I hosted one Thanksgiving back in 2006 and this was the recipe for stuffing that I used and it was delicious. I am bringing this stuffing on thursday out to Weston, and will post a picture later. We don't cook the stuffing in the bird to make the bird gluten free friendly. But, here you go. 

Bread Stuffing with Sage & Thyme
Cooks Illustrated
8 tablespoons (1 stick) unsalted butter
1 large white onion, chopped
4 ribs celery, diced (around 1.5 cups)
1/2 teaspoon dried sage
1/2 teaspoon dried thyme
1/2 teaspoon dried marjoram
1/2 cup minced fresh parsley
1/2 teaspoon ground black pepper
12 cps dried 1/2 inch bread cubes - using either french load, potato or challah bread
2 cups chicken stock (can use low sodium canned broth)
3 eggs, lightly beaten
1 teaspoon table salt

Preheat oven to 400 degrees. Heat butter in a large skillet over medium heat until fully melted. Pour off 2 tablespoons and reserve. Add onion and celery and saute until translucent, around 8 minutes. Stir in sage, thyme, marjoram, parsley, black pepper and cook for another minute. Transfer mixture to large bowl and add bread cubes, chicken stock, eggs & salt and toss to distribute ingredients evenly. Turn mixture into buttered 13x9 inch baking dish and drizzle with reserved butter. Cover tightly with foil and bake for around 25 minutes. Remove foil and bake until crust is golden brown - another 15-20 minutes. Serve warm. 

My mom is making cranberry chutney, and I'm planning to bring a round of brie to spread the chutney over for an appetizer. This chutney is awesome, especially for this purpose. It is good to make it a few days in advance so the flavors can gel together.While I'm not making it this time, here is the recipe:

Cranberry Chutney
3 oranges, peeled and chopped
2 cups sugar
1/2 cup raisins
1/4 cup chopped walnuts
1/2 teaspoon ginger
1/2 teaspoon cinnamon
4 cups fresh cranberries
1 cup chopped apple
1/2 cup orange juice
1 tablespoon vinegar

This is very easy. Put all ingredients (except for walnuts) in a large saucepan and bring to a simmer. Let cook until all of the cranberries are popped. Add the walnuts at the end (off heat), and you're done!

I am going to be making a green bean dish. I haven't decided on one for sure yet, but will probably be making the one below. I made it for my 2006 Thanksgiving and it was good (I don't really like green beans, but relatively speaking good). I don't really get green bean casserole, mostly because I get annoyed when I am encouraged to bog down veggies with cream and cheese. This is a simple and healthy way to spice up your green intake on turkey day. 

Green Beans with Tomatoes
Cooks Illustrated
Ingredients
1 tablespoon olive oil
1 small onion, diced
2 small cloves garlic, minced
1 cup canned chopped tomatoes
1 pound green beans, stem ends snapped off (I also cut the beans in half)
2 tablespoons fresh parsley leaves, minced
1/4 teaspoon salt
Pepper to taste

Heat oil in a large saute pan over medium heat. Add onion and cook until softened (around 5 minutes). Add garlic and continue cooking for another minute. Add tomatoes and simmer for another 5 minutes. Add green beans, salt and pepper and stir. Cover the pan and let cook, stirring occasionally until beans are tender but still offer some resistance, about 20 minutes. Stir in parsley and serve. 


    Thursday, November 19, 2009

    Apple Galette

    Aka apple pizza. A galette is a free form pie, and can take many shapes. Most traditional galettes have the crust folded high over the topping (like a volcano). However, I find this a pain to eat. So I shape mine like a pizza, and cut into pizza slices! This particular galette is good for people who really like crust...such as myself. My favorite part of pie is the crust. People like Doug aren't such huge fans since he isn't a crust person. No worries....more for me.

    1 recipe pie crust (again, using recipe from Leslie of Helen's Kitchen)
    4-5 granny smith apples, peeled and thinly sliced
    1/4 cup sugar
    2 tablespoons unsalted butter, cup into little pieces
    1/2 cup apricot preserve
    1 tablespoon water
    Lemon juice

    As you cut your apples and transfer batches of slices to a bowl, squeeze lemon juice over them. This will prevent the apples from browning. If you microwave the lemon for 10 seconds, it will release more juice.

    Roll out your pie dough and transfer to a baking sheet. Fold over edges, like a pizza crust. Arrange your apple slices (using picture below if you need some visual assistance) in overlapping concentric circles. Brush the crust with milk or water. Sprinkle sugar over the whole thing. Sprinkle the butter pieces over the apple portion of your galette. Bake at 400 degrees for around 40 minutes. Keep an eye on it, and if your crust is browning too quickly then make a little ring out of aluminum foil and lay over the crust.

    While it is cooking, bring apricot preserve and water to a boil in a saucepan. Take off heat and strain out the large chunks. Once the galette is out of the oven, brush your glaze over the whole thing for a nice shiny finish.


    Baked Buffalo Wings

    I reeeallly like buffalo wings. Who doesn't? People who associate them with high calorie greasy bar food. Well, good news - they don't have to be bad for you. If you bake them and are sparing with the dressing (or find a good low calorie dressing, like fat free ranch) then they're pretty low in calories. How I make them is below.

    2 lbs of chicken wings (around 20), I get them from Whole Foods
    2 packets McCormick Original Buffalo Wing Seasoning
    Franks Original Red Hot
    1 egg

    So, we all know chicken isn't bad for you. The Franks Red Hot has ZERO calories per serving (unless you get mild, I once heard that the mild sauces are diluted with butter because the sauce is naturally spicy...but I can't confirm) and the seasoning has 150 calories a packet. Not bad, especially since you only end up using 1.5 packets. Also, use less if you're not too into the spice. I loooove spice, and these wings were so spicy it made our noses run. Just how I like it :-)

    Dilute the egg with a little water and mix. Dip each wing in egg, then drudge in seasoning. Line the wings up in a baking dish and once all are drudged in seasoning, bake at 450 degrees for around 45 minutes. When out of the oven, sprinkle some Red Hot over them. Now take a whole bunch of paper towels to the table and enjoy!


    Monday, November 16, 2009

    Pot Roast

    My dad is a very good cook, and there are some things I always associate with him - dishes he perfected over time that were so delicious. A perfect example is pot roast. He gave me lots of options, depending on what I was looking for in my pot roast. This is how I made it:

    Ingredients:
    1 three lb chuck roast, tied
    Few tablespoons all purpose flour
    2 yellow onions
    3 cloves garlic
    1 turnip
    3 carrots
    1 package diced portobello mushrooms (1 pint...could also use button mushrooms)
    1 bottle of medium bodied fruity red wine (avoid using really something heavy on the oak flavor)
    1 can of tomato sauce (just pureed tomato, different from marinara/pasta sauce), 29 ounces
    1 can tomato paste - 6 ounces
    1 fresh herb bouquet (parsley, thyme, oregano & rosemary - took a few springs of each, tied together)
    1 package french onion soup mix

    Roll your tied chuck roast in flour. Heat olive oil in a dutch oven (or large heavy bottomed saucepan with lid) over medium heat and brown roast on all sides - this will take around 20 minutes total. Leave on each side for a few minutes. Remove roast from pot, set aside.

    Saute onions (add more olive oil if necessary) until wilted. Add crushed garlic and cook for another minute ish. Add mushrooms, carrots and turnip (all chopped). Cook for several minutes, then add roast back to pan. Add wine, tomato sauce, tomato paste, herbs and onion soup mix.

    Cover the pot and reduce heat to simmer. Leave for 2-3 hours, however long it takes to easily stick a fork through the meat. Make sure to turn your roast half way through if it isn't totally submerged in the liquid.

    Remove roast and set aside again. Cover with foil. Take out the herb bouquet and turn heat up and let sauce reduce to desired thickness. Slice meat, serve with mashed potatoes (recipe posted separately) and ladle sauce with veggies over the whole thing.

    This is the roast, all ready to eat, out of the pot:


    This is the sauce, after it has reached the desired consistency:


    This recipe makes plenty of sauce, so ladle generously over your meat and potatoes!

    Mashed Potatoes

    I made mashed potatoes to serve with my pot roast, but I decided to start posting recipes separately, even if I make them together. My go to cooking gurus (Cooks Illustrated) usually recommend using Yukon Gold potatoes when making mashed potatoes, but I prefer regular old white potatoes...also known as Idaho or Russet. Recipe below (I made this up, no reference here!).

    4 potatoes
    2/3 cup whole milk
    1/3 cup half and half
    4 tablespoons melted butter
    1/2 cup shredded mozzarella
    2-3 minced/pressed garlic cloves
    salt and pepper to taste

    A method I learned from Cooks Illustrated is to cook the potatoes in their skins, and peel later. Some think this is a pain as you're peeling when hot, but I've never had trouble preventing burning and I think it is easier than peeling the raw potatoes. The skin comes off much quicker. So, I cooked my potatoes in water in a covered pot over medium-high heat for around 25 minutes. You'll know when the potatoes are done when you can easily stick a fork all the way through. Drain water out of the pot and peel the hot potatoes. I do this by using two forks so I don't actually have to touch them.

    Once peeled, return to pot and mash with 4 tablespoon butter (which will melt by itself, just add solid butter to pot), milk and half and half. The measurements are approximations, I just add little by little until desired consistency. Add garlic, salt, pepper and a little cheese. Stir, and serve!

    Wednesday, November 11, 2009

    Cupcakes for Lauren

    I had a vision - pink cupcakes. Pink equals raspberries, and raspberries belong with chocolate. So, I turn to the Cake Bible for raspberry frosting, and Cooks Illustrated for the chocolate cupcakes.

    You should always let the cake cool completely before frosting, and I find it is way easier to frost a cake when the frosting is freshly made. Just so you know.

    Dark Chocolate Cupcakes, Cooksillustrated.com:

    1 stick unsalted butter
    2 ounces bittersweet chocolate
    1/2 cup dutch processed cocoa
    3/4 cup all purpose flour
    1/2 teaspoon baking powder
    2 large eggs
    3/4 cup sugar
    1 teaspoon vanilla extract
    1/2 teaspoon salt
    1/2 cup sour cream

    1. Adjust oven rack to lower-middle position; heat oven to 350 degrees. Line standard-sized muffin pan (cups have 1/2-cup capacity) with baking-cup liners.

    2. Combine butter, chocolate, and cocoa in medium heatproof bowl. Set bowl over saucepan containing barely simmering water; heat mixture until butter and chocolate are melted and whisk until smooth and combined. Set aside to cool until just warm to the touch.

    3. Whisk flour, baking soda, and baking powder in small bowl to combine.

    4. Whisk eggs in second medium bowl to combine; add sugar, vanilla, and salt and whisk until fully incorporated. Add cooled chocolate mixture and whisk until combined. Sift about one-third of flour mixture over chocolate mixture and whisk until combined; whisk in sour cream until combined, then sift remaining flour mixture over and whisk until batter is homogenous and thick.

    5. Divide batter evenly among muffin pan cups. Bake until skewer inserted into center of cupcakes comes out clean, 18 to 20 minutes.


    Frosting: from the Cake Bible, Neoclassic Buttercream with Raspberry Flavoring

    6 large egg yolks
    ¾ cup sugar
    ½ cup corn syrup
    2 cups unsalted butter, softened (really, really soft...butter can stay out of the fridge for a long time. Keep it out all day)
    2 to 4 Tablespoons liqueur or eau-de-vie of your choice

    Have ready a greased 1 cup heatproof glass measure near the range.

    In a bowl beat the yolks with an electric mixer until light in color - this will take several minutes. Meanwhile, combine the sugar and corn syrup in a small saucepan (preferably with a nonstick lining) and heat, stirring constantly, until the sugar dissolves and the syrup comes to a rolling boil. (The entire surface will be covered with large bubbles.) Immediately transfer the syrup to the glass measure to stop the cooking.

    Pour a small amount of syrup over the yolks with the mixer turned off. Immediately beat at high speed for 5 seconds. Wait until batter cools - you don't want the eggs to get so hot that they scramble or something. Stop the mixer and add a larger amount of syrup. Beat at high speed for 5 seconds. Continue with the remaining syrup. For the last addition, use a rubber scraper to remove the syrup clinging to the glass measure. Continue beating until completely cool.

    Gradually beat in the butter and, flavoring.

    Raspberry flavoring:

    Suspend 24 ounces of frozen, unsweetened raspberries over a strainer and let sit for several hours to collect juice. I used the help of a lamp:

    A lamp makes the process much, much quicker. Press the rest of the juice out with the back of a spoon - you should have around 1.5-2 cups by the end. Take 1 cup raspberry juice, reduce over medium heat until down to around a 1/4 cup. Mix back with the unreduced juice with 2 teaspoons of lemon juice and add to frosting to taste. I added around 1/2 a cup. You don't want to add so much that the consistency of the frosting will change.

    Then, frost your cupcakes! My finished product, all ready to go:

    Sunday, November 1, 2009

    Perfect Pumpkin Pie

    As I'm full into the fall spirit, I wanted to make a pumpkin pie. So I did! It was delicious, and not too sweet. I like being able to taste the pumpkin! It annoys me when people dump tons of spices into the tasty pumpkin. I decided on the recipe from The Pie and Pastry Bible by Rose Levy Beranbaum, Scribner 1998, page 198.

    Again, I used the pie crust recipe that I learned in one of the classes I took with Leslie of Helen's Kitchen. I don't feel right sharing the recipe, but there are lots of good pie crust recipes out there! The good ones are surprisingly simple. I will say that the one of the tricks is that you have to keep the butter super cold, and don't process the dough too much. You should be able to see slivers of cold butter in your dough when you're done. When these slivers melts in the oven, it creates the flakiness. Yuum.

    With my disclaimer out of the way, on to the pie!

    1 pie crust recipe, rolled 1/4 inch thick

    Drape over 9 inch glass pie pan, folding the overhanging crust under to make the walls of the pie crust thicker than the bottom.

    4 (2-inch) gingersnaps
    1/4 pecan halves

    1 (15 ounce) can of unsweetened pumpkin puree (no added spices - the only ingredient should be pumpkin)
    3/4 cup of light brown sugar, packed (author makes a note not to substitute dark brown sugar - will mask the flavor of the pumpkin)
    2 teaspoons ground ginger
    1.5 teaspoons cinnamon
    1/2 teaspoon salt
    2/3 liquid cup milk
    2/3 liquid cup heavy cream (make sure to read the ingredients of the cream, and if there is more than the one ingredient of cream, don't buy it and check a different brand)
    3 large eggs
    1/2 teaspoon pure vanilla extract

    Preheat oven to 375 degrees. Process the gingersnaps and pecans in a food processor until finely ground. Sprinkle over uncooked pie dough (in the pie pan) and press into dough with the back of a spoon.

    In a medium saucepan, stir the pumpkin, spices, brown sugar and salt together and bring to a simmer over medium heat. Turn down heat to low and let cook for another 5 minutes (stirring constantly the whole time).

    Scrape mixture into food processor and process for 1 minute. With the motor on, add milk and heavy cream. Add eggs one at a time, process for 5 seconds after each egg. With the 3rd egg, add the vanilla.

    Pour mixture into unbaked pie shell and place on a cookie sheet as close to the bottom of the oven as you can. Bake for 50-60 minutes, or until knife comes out mostly clean. Keep an eye on your pie and if the edges of the pie crust are getting too brown, cover with a ring of aluminum foil (just the outside, the center of the pie should be exposed).

    I had some extra pie crust, so I rolled it out and cut out shapes (a leaf and a few pumpkins, to be exact) to put on top of my pie. I was a little overly excited to feed Doug some pie (after it cooled, of course) and I completely forgot to take a picture before I cut into it. Oh well, here is the pie - minus 1 slice!


    Nutella Cupcakes

    What are Nutella cupcakes? These:


    Don't they look delicious? They are. I sometimes call them muffins, because the frosting (the Nutella) is on the inside. These are therefore really easy cupcakes to ship, so they were appropriate to send to NYC for oldest sister's bday. They were originally found by middle sister, Meredith.

    Recipe:

    1.5 sticks butter, softened
    3/4 cup granulated sugar
    3 large eggs
    1/2 tsp vanilla extract
    1 3/4 cups sifted all purpose flour
    1/4 tsp salt (omit if using salted butter)
    2 tsp baking powder
    Nutella, approx. 1/3 cup

    Preheat oven to 325F. Grease the muffin tin cups with some butter.

    Cream together butter and sugar until light using hand held mixer, 2 minutes. Add in eggs one at a time, until fully incorporated. Add vanilla. Stir in flour, salt and baking powder until batter is uniform and no flour remains.

    Fill each muffin cup about 3/4 full. The batter will be thick. Top each cake with a dollop (a teaspoon or two) of Nutella. Swirl Nutella in with a toothpick.

    Bake cupcakes for about 20 minutes. Remove to a wire rack to cool completely.
    Makes 12 cupcakes.


    Not only easy to ship, but delicious!